Dealing With Duplicate Files
In the physical world, we encounter much difficulty because it’s hard to create copies of things: objects use finite resources and are expensive to produce, we have to physically repeat tasks over and over to do them multiple times, and so on. Ironically, in the digital world, many problems instead stem from how easy it is to copy things: some people make unauthorized copies of media and anger the distribution companies; others get doxxed and material they never wanted to share with anyone makes its way to millions of people; and all of us end up with four copies of the same set of files wasting our hard drive space and preventing us from remembering where we put things!
Fortunately, when it comes to extra files on our computers, there are tools to help us identify and clean up the duplicates. The computer can’t magically fix your duplicates for you, since they’re a symptom of bad organization rather than a problem in themselves, but it can help out a lot.
I discuss two free tools here, dupeGuru (Windows/Mac/Linux) and rdfind (Mac/Linux). I’m a big fan of rdfind. It is lightning-fast, easily scriptable, and very flexible in terms of specifying what you want to do with duplicated files. However, it does not work on Windows and is slightly irritating to install on a Mac, and it only offers a command-line interface (if typing commands scares you, start with dupeGuru, but also check out why typing commands is like using language and can often be more natural than point-and-click).
If you aren’t interested in scripting, don’t expect to be doing duplicate checks often, don’t want to link duplicate files to one reference copy, and don’t mind manually selecting files to keep when several copies come up, dupeGuru is easier to learn, still quite powerful, and probably a better choice overall. And if you’re using Windows, go with dupeGuru; trying to get rdfind to work on Windows is not worth it.
There are other tools out there.
dupeGuru and rdfind both search by file content;
whatever tool you choose, don’t waste your time and risk getting confused
with a tool that only checks file names for duplicates.
This creates vast numbers of both false positives
(e.g., 15 files called report.pdf that are totally unrelated)
and false negatives
(e.g., 50 copies of the same file called something different in each place).
What to do with duplicate files
Before we look at our tools, let’s consider what we want to do with them. As alluded to earlier, there is no single answer to how duplicate files should be handled. The right answer depends on why the files are duplicates, so it’s something you’ll have to think through yourself. However, let’s go through what options you have once you’ve identified duplicate files using one of these tools.
Ignore the duplicates
Sometimes you have files that are technically duplicates but aren’t a big deal. For instance, some programs might create configuration files that only contain a few words and might occasionally be the same from program to program or be stored in multiple places. These don’t take up much hard drive space and they aren’t confusing you, and figuring out how to clean them up without breaking the programs could be challenging, so ignoring them is the best option.
Reorganize your filesystem
Sometimes finding duplicates will allow you to realize that you have virtually the same files in multiple locations, and when you investigate the similarities you can merge together or outright delete some folders. This is a great outcome – you’re saving space and making big improvements on your organization.
Delete the files
Maybe you found a 20GB folder of backups from 2006 (I still have an unpleasant number of these lying around!) and it contains hundreds of files you have somewhere else. You don’t need that backup from 2006 as a backup anymore (if you think you might, go make an actual backup!), so you can just plain delete those files.
Create symbolic links from duplicates to one of the files
This can be a handy option if you discover you are storing files in multiple places because they actually make sense in multiple places. For an example, see my system for organizing my photo folders, or the reports example below. However, picking symlinks without actually looking at the files you’re linking is the worst of all possible choices! As I’ve mentioned before, for good results, links should be used only to augment an already decent organizational system rather than substituting for one.
Unfortunately, dupeGuru cannot create links, so if you’re not willing or able to use rdfind or go hunting for another duplicate-finding tool altogether, you’ll have to create any needed links by hand or choose another option.
Create hard links
This will keep all the files in place as before, but make them all point to the same data on disk. All the usual drawbacks of hard links apply (see the link above). There are good use cases for this (for instance, making backup snapshots or allowing users to upload popular files to a website and store them in their own accounts without wasting space), but unless you know you have one of the classic good use cases, you usually should not choose this option. Again, only rdfind and not dupeGuru can create hard links from your duplicates.
Using dupeGuru
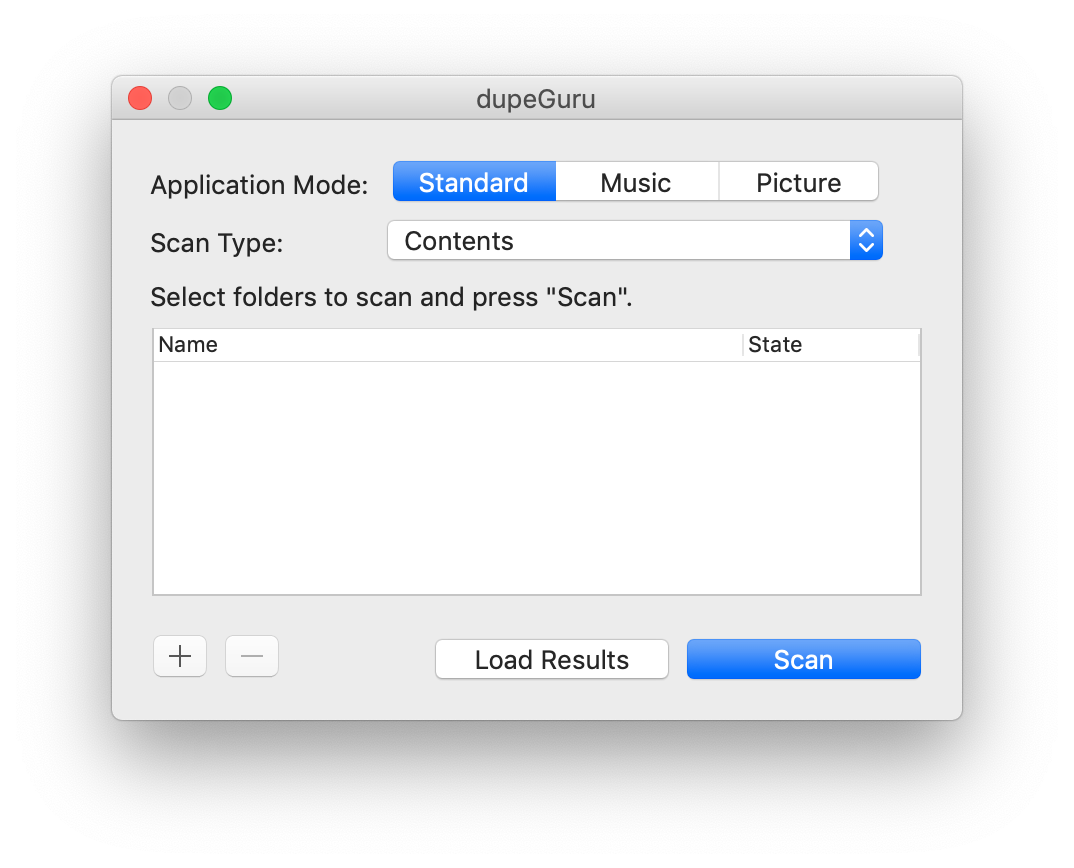
You’ll first want to download dupeGuru from its official website, for Windows, Linux, or Mac OS X as appropriate for your computer. After starting dupeGuru, you’ll see something like this:
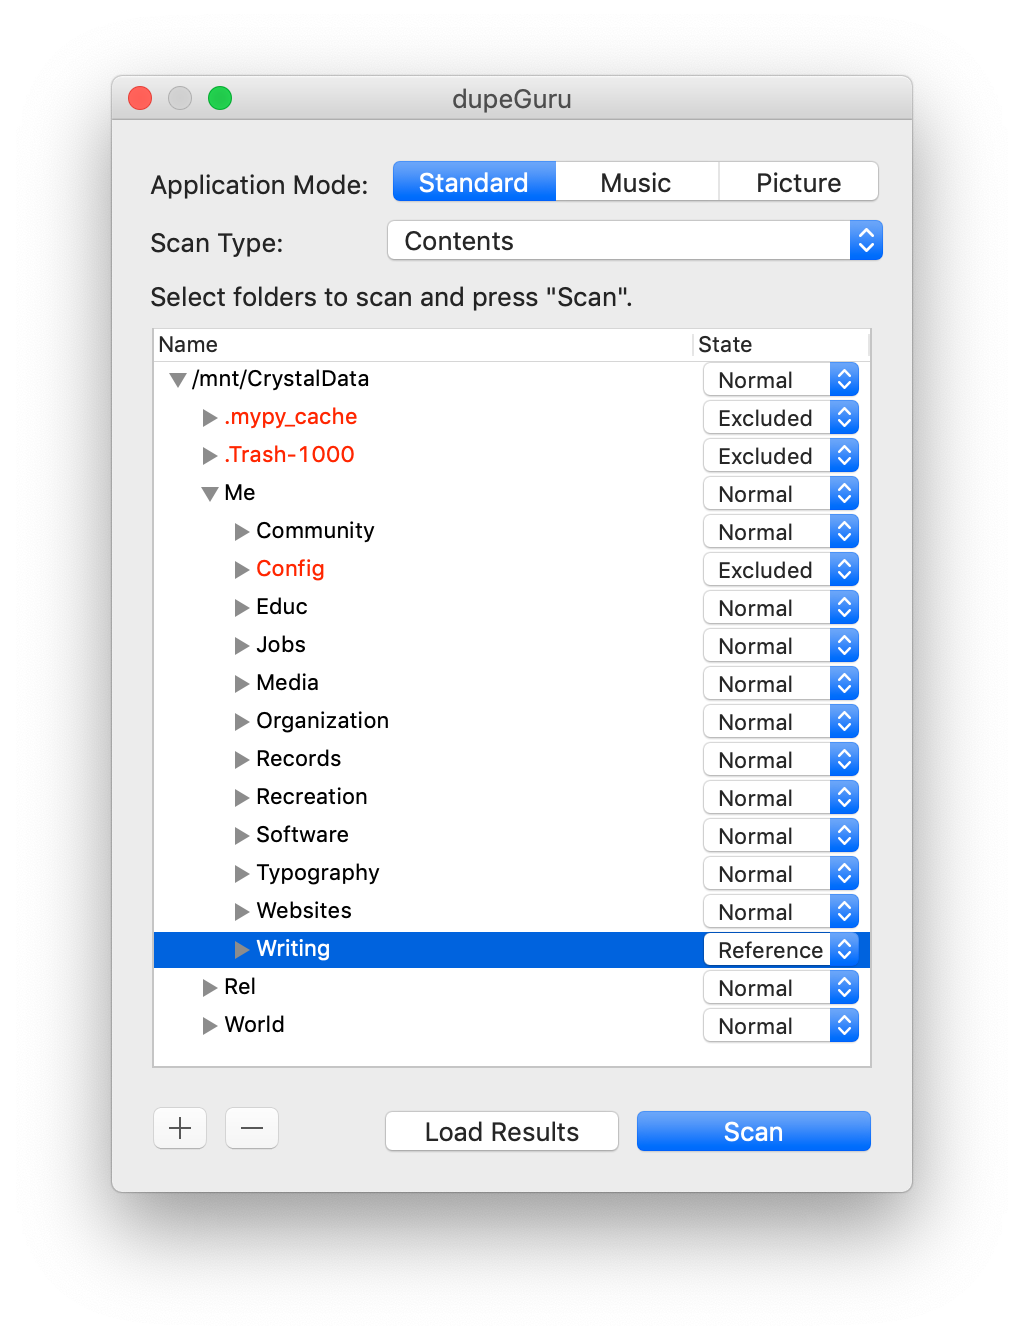
Click the + button and choose the folder you want to scan for duplicates. You may also want to specify some folders as “references” by clicking the drop-down in the State column, or exclude them from the check entirely. Reference folders are much like rdfind’s concept of an “original” folder; the files in these folders will always be considered the definitive copy and never offered for deletion or other treatment. Here’s an example of scanning my main hard drive (there’s no reason behind my exclude or reference choices, I just put them in as an example):
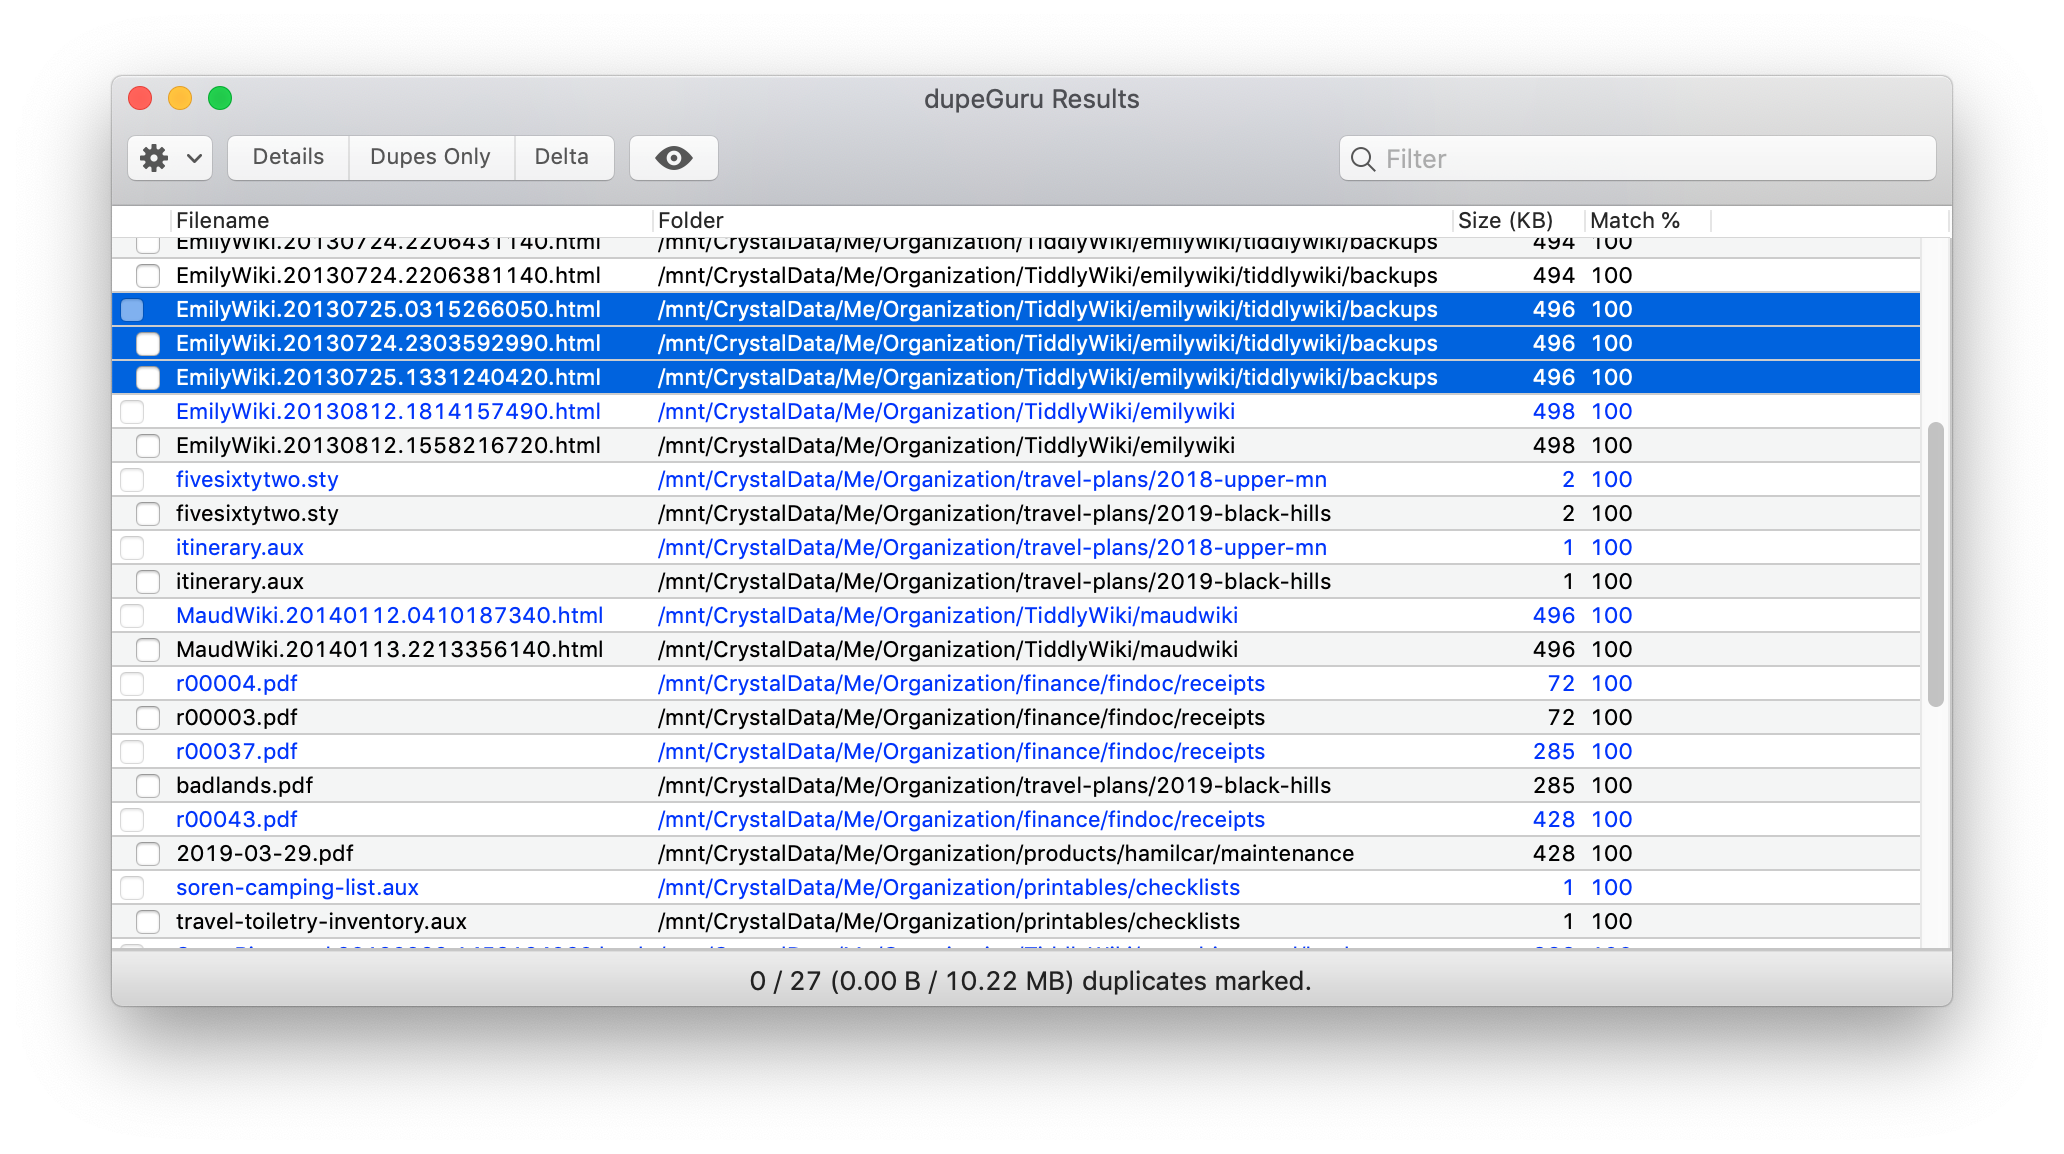
You can add multiple folders if you need to. Then choose Scan. Once the scan completes, you’ll see a list of duplicated files. The top entry in each grouping is the “reference” file and can’t be selected (according to the documentation, one that’s in a “reference” folder if you specified one earlier, or else whichever file is the largest, or else I guess by black magic if they’re all the same size). The remaining (indented) entries are duplicate copies of that file. You can see that I’ve highlighted here three backups of a wiki page that contain the exact same content:
There are a number of fancy ways to select files; for instance, you can use the Filter in the upper-right and then mark all the files that match the search (using Edit → Mark All). Typically, you will just want to run through the list and check off the files you want to delete. When you’re done, choose Actions → Send Marked to Trash. You can also choose to move them or even copy them (if you want to create even more duplicates?). I have to admit I’m kind of confused about the use case for these options, but they’re there if you can think of one.
Note: dupeGuru can also do “fuzzy matching” on music and photos – finding files which are very similar but not quite identical. I haven’t tried this function myself, but I’ve heard mixed reviews on its effectiveness and accuracy. If you want to try it, you can select this option on the initial screen when you start a scan with dupeGuru.
Using rdfind
Installation
On Linux, rdfind is readily available in most package repositories
(e.g., on Debian-based distributions like Ubuntu and Linux Mint,
run sudo apt install rdfind).
If it’s not in yours, you can download from GitHub
and compile from source.
On MacOS, you want to install through MacPorts. If you don’t already have it installed, first follow the instructions to install MacPorts. Then open the Terminal app and run the following commands, pressing Enter after each and providing your password on request:
sudo port selfupdate
sudo port install rdfind
Go grab a cup of tea – it can take a few minutes to install everything.
When it finishes, you should be able to type rdfind and get a help message.
rdfind basics
The easiest way to find duplicates is to
change into the folder you want to search for duplicates
(an easy way: type cd ,
drag and drop the folder
out of Finder or your file browser into the terminal window,
and hit Enter)
and run rdfind .
(the dot indicates you want to search the folder you’re in).
This will create a text file called results.txt in this folder,
containing one file per line.
The display looks intimidating at first,
but you don’t need to understand most of it.
Here’s an example:
# Automatically generated
# duptype id depth size device inode priority name
DUPTYPE_FIRST_OCCURRENCE 492 3 920 436207633 86712 1 ./.mypy_cache/3.6/urllib/__init__.data.json
DUPTYPE_WITHIN_SAME_TREE -492 4 920 436207633 447327 1 ./actions/.mypy_cache/3.6/urllib/__init__.data.json
DUPTYPE_FIRST_OCCURRENCE 427 6 1097 436207633 86724 1 ./.mypy_cache/3.6/requests/packages/urllib3/packages/__init__.data.json
DUPTYPE_WITHIN_SAME_TREE -427 7 1097 436207633 447339 1 ./actions/.mypy_cache/3.6/requests/packages/urllib3/packages/__init__.data.json
DUPTYPE_FIRST_OCCURRENCE 451 3 1346 436207633 86734 1 ./.mypy_cache/3.6/requests/compat.data.json
DUPTYPE_WITHIN_SAME_TREE -451 4 1346 436207633 447349 1 ./actions/.mypy_cache/3.6/requests/compat.data.json
The first column lists what “type” of file it is.
The first file found shows DUPTYPE_FIRST_OCCURRENCE,
while all other instances of the same file will indicate different types
(exactly which type is usually not important).
The last column is the path to this file.
If you have only a few duplicates or the listing of duplicates
identifies issues in your organizational system you can fix,
you can deal with them manually
and then rerun the check to confirm you got them all,
but if you have a bunch,
you’ll probably want rdfind to delete them or create links for you.
To do so, run rdfind again, including
-makesymlinks true, -makehardlinks true, or -deleteduplicates true
in the command (e.g., rdfind -deleteduplicates true .).
If you’re not sure which to use,
review the What to do with duplicate files section earlier on this page.
One place most duplicate-finding tools fall flat is deciding which file to delete when there are multiple copies. You either have to manually specify which to delete, or the tool picks one essentially at random (in the better tools, like dupeGuru, you can at least choose specific folders whose files should not be deleted).
rdfind makes this easy and customizable
by introducing the concept of a ranking.
Above we gave rdfind just one folder to search, .,
but we can actually give it a list of folders separated by spaces, like
rdfind folder1 folder2 folder3.
We can also use wildcards, like
rdfind special-folder *
(list special-folder first,
then everything in the folder alphabetically
– “everything” includes special-folder itself,
but rdfind is smart and will ignore it the second time
if we list it twice).
Files in folders which come first on the list are ranked higher,
and files which are higher up in the folder tree are ranked higher
(e.g., folder1/file is ranked above folder1/subfolder1/file).
Whichever file has the highest ranking is considered the “original”
and all other files are deleted or turned into links.
Thus, you simply make sure the copies you want to keep
come first in the list
and rdfind does exactly what you need, automatically.
This is so much easier than any other tool I’ve ever used
that I’m baffled it’s not a more common approach.
See below for an example.
Warning: If these rules don’t place at least one copy ahead of the others,
the ranking is undefined and rdfind will choose which copy to keep itself
(the choice will probably be consistent if you run rdfind multiple times,
but which file is chosen depends on
the order your operating system decides to list them in).
Example cleanup with rdfind
While rdfind is more flexible than dupeGuru, it’s a bit harder to learn without a visual interface where you can easily see what’s going on. Let’s take a concrete look at one way we could clean up some duplicates.
Imagine we have the following folder structure (this example is not a perfect folder structure, but bear with me):
|- documents
|  |- budget
|  |- current-job
|  |- old-job
|  |- reports
|- pictures
|  |- backups
|  |- family
|     |- my-favorite-event
|     |- ...
|  |- professional
|     |- another-great-event
|     |- ...
And this results.txt from running our first rdfind .
at the top of this tree:
DUPTYPE_FIRST_OCCURRENCE ... documents/old-job/Z.docx
DUPTYPE_WITHIN_SAME_TREE ... documents/reports/2018/Z.docx
... more reports like this
DUPTYPE_FIRST_OCCURRENCE ... pictures/backups/A.jpg
DUPTYPE_WITHIN_SAME_TREE ... pictures/backups/C.jpg
DUPTYPE_FIRST_OCCURRENCE ... pictures/family/my-favorite-event/A.jpg
DUPTYPE_WITHIN_SAME_TREE ... pictures/professional/another-great-event/C.jpg
... more pictures like this
After looking at what duplicates we have above,
we’ve reviewed our requirements
and decided we want to keep a copy of all documents in reports
and create symbolic links to there from any other documents folders.
For our pictures, we want to keep those
in our family and professional folders
and delete anything in the backups folder
that we have an identical copy of somewhere else.
Here’s how we could do that.
First, we enter the documents folder and run rdfind,
setting the reports folder as the definitive copy by placing it first
and placing everything else next so any duplicates will be turned into links.
cd documents
rdfind -makesymlinks true -dryrun true reports *
The -dryrun true option will cause rdfind to change nothing
but instead spit out a list of all the changes it would have made.
We double-check that list looks right,
then remove the -dryrun true and run again.
This two-step process might take a little longer,
but it takes a lot longer if you mess something up!
As the saying goes, measure twice, cut once…
Now for the pictures.
cd ../pictures
rdfind family professional
rdfind -deleteduplicates true -dryrun true family professional backups
rdfind -deleteduplicates true family professional backups
cd ../pictures moves into the parent folder
(that is, the top level of our example filesystem)
and then enters the pictures folder.
We then use rdfind on all the folders that are not backups
(viz., family and professional).
We are hoping to get no duplicates at all here,
because our requirement was to delete only things in the backups folder.
If there are duplicates here
that don’t have copies in backups as well,
the ones in professional will be deleted
in favor of the first copies in family,
since family is the first folder in the list
that contains one of the copies.
Maybe that’s acceptable,
but it’s not what we identified as our goal,
so it would be nice to know if we need to adapt our goal
before the computer just changes things without telling us!
If we did find duplicates,
we would want to figure out why we have the same photos
in our family and professional folder
and sort that out before continuing.
Note: We don’t technically have to do this step in this case,
as there were only 6 duplicates in our example list
and we can plainly see that the only duplicates
are between backups and another folder.
However, we would definitely want to double-check
if there were hundreds of files.
In fact, we should have done this double-check
when we symlinked the reports earlier as well;
I just didn’t want to complicate the first example.
Finally, we actually delete the duplicates,
doing a dry-run step first to double-check our work as before.
Here we had to list out all the folders rather than using *
– if we had put * first, backups would have been put
before family and professional since * lists in alphabetical order.
